Blob Storage in 9.2

With the introduction of 9.2 there are two new types of document stores: 

 
2017-12-06_21-04-14.png

I'm going to focus on the Microsoft Azure Blob Store for now, as that's what I have access to.  Before continuing within  Content Manager, I first flip over to Azure and create a new storage container.  Once that has been created I'll flip back over to CM.

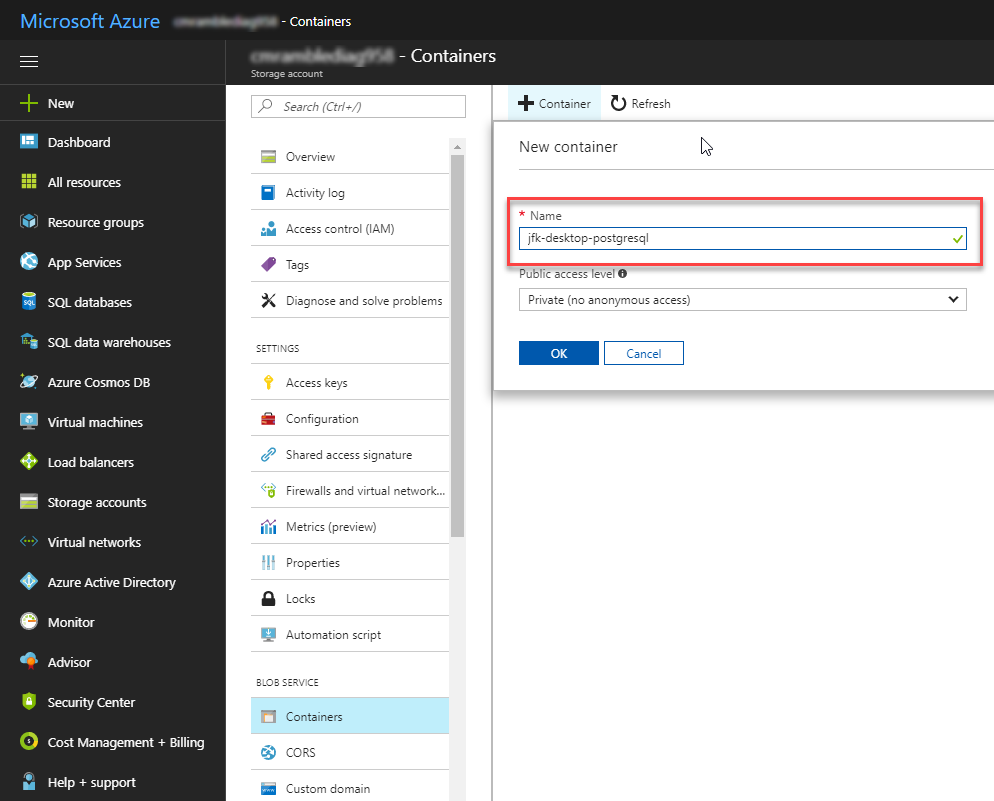
After creating the container I then went to the storage account and found the access keys.  From there I can copy the connnection string to my clipboard and paste it into the new document store dialog.  

2017-12-06_20-59-48.png

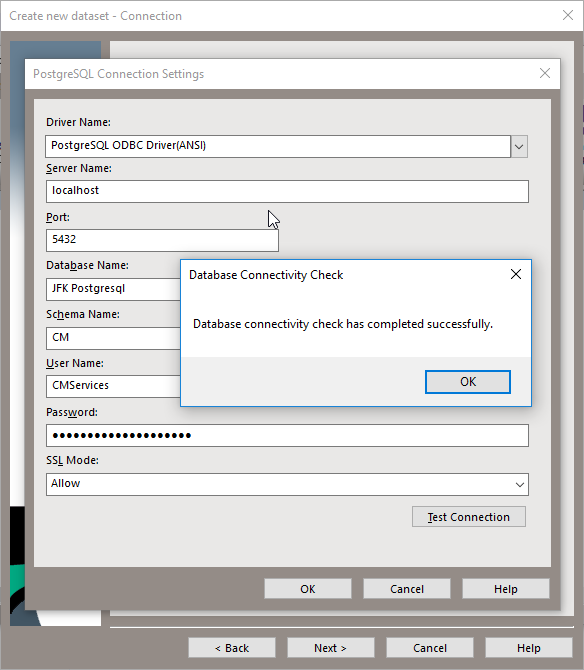
Now back over in CM I can complete the details of the document store.

2017-12-06_21-08-49.png

Then I clicked test to verify the settings...

2017-12-06_21-08-55.png

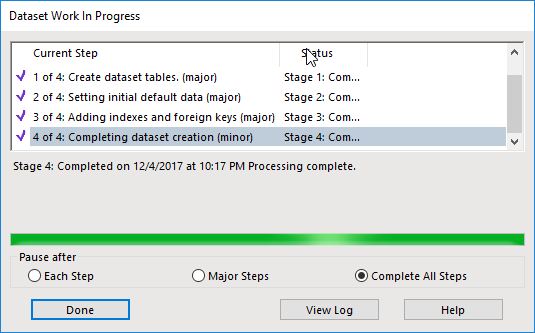
Then I go create a new document record type that will use this document store...

2017-12-06_21-10-30.png

Now I can import a document and see what happens...

2017-12-06_21-12-14.png

Over in Azure I can see the file has been uploaded..

2017-12-06_21-14-55.png

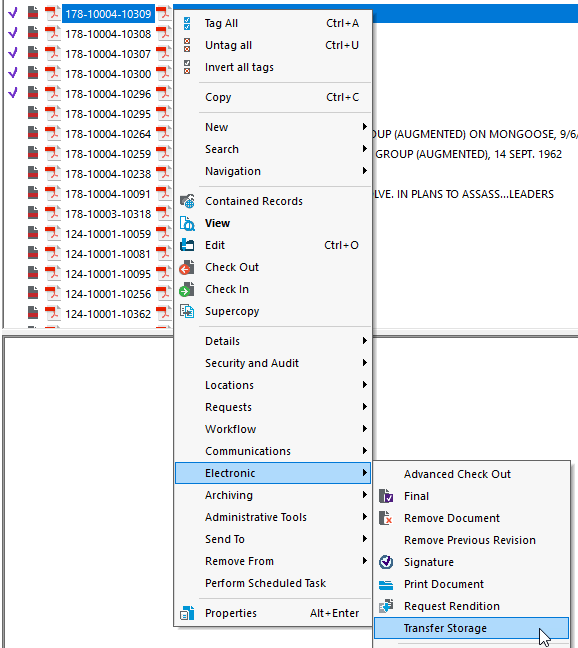
I can manually transfer a few records to the document store from the electronic sub-menu of the context menu...

2017-12-07_2-15-59.png

When prompted I just need to pick the new document store..

2017-12-07_2-16-39.png

Alternatively, I could transfer the entire contents of any store into this one by selecting transfer from the context menu of a document store.  The default options are the best.  You should not need to use the others.

2017-12-07_2-19-07.png

Lastly, I might want to use the Blob storage as a cheaper storage layer for older content.  I should use the tiered storage options if available to me.  I can make this a storage tier 3.

2017-12-07_2-21-52.png

But I'll update the main document store so that the dates are tracked (it was already at level 1)...

2017-12-07_2-23-46.png

Now I can create a saved search that I'll run routinely to move records to cheaper cloud storage.  Note the search below finds all items using the main store but accessed more than a year ago.

2017-12-07_2-26-38.png

I would tag all the resulting records and transfer them to storage tier 3.  This could be automated via a powershell script as well.  Lastly, workgroup server level document caching may be warranted when using blob storage.

Monitoring the CM Elasticsearch Index

Here's a couple different ways to manage your new CM 9.2 Elasticsearch instance.


via Chrome


Visit the webstore and add the ElasticSearch Head extension.

2017-12-05_22-25-23.png

Then when you launch the extension you can update the server address.  With the visuals I can easily see that the unassigned shards are what's pushing my health to yellow.  

2017-12-05_17-01-51.png

You can also browse the data in the index

2017-12-05_17-04-30.png

via Head Stand-alone Server


The same functionality as what's shown above, however the interface is a stand-alone server operating off port 9100.  You'd access it via any browser from address http://localhost:9100.  You would use this option if you can't use chrome.  


via Powershell


Install Elastico from an elevated powershell prompt.

2017-12-05_9-54-45.png

You have to trust the repository in order to continue.  If you're in a secure environment then visit the github page for the source, then manually install the module.

2017-12-05_9-55-34.png

Now I can run a command to check the overall cluster's health...

2017-12-05_10-06-05.png

Another command to check the statuses of the indexes...

2017-12-05_10-08-45.png

Note that in both instances I'm calling a script intended for v5 even though I'm using v6.  I can actually run any version of the command as they all seem to be forward & backward compatible.  Probably still makes the most sense to run the one intended for the most recent version of ES.

I can also perform a search.  I went to the client and found the record I worked with in my last post (I had used Kibana as a front-end to the ES index).  Then I searched via powershell.

2017-12-05_10-21-31.png

via Kibana


When creating your index pattern, keep in mind that the default naming convention for the CM content index starts with "hpecm_".  You could use that, or just a plain asterisk, to configure your access.  If you wish to use the Timelion feature then you should also pick the date registered field as the time filter.

2017-12-05_22-05-46.png

When you then click discover you can explore the index.

2017-12-05_22-10-35.png

You can pick a different time period that might show some results...

2017-12-05_22-11-18.png

If I can now get some data then I know the system is at least partially working.  Kibana doesn't really give much detail as to the internal workings of the cluster and/or index.

2017-12-05_22-12-40.png

Creating a PostgreSQL Dataset

Creating a database that uses PostgreSQL is just as easy as SQL.  Here I'll step through the process and show screenshots of the various steps.  Although I'm using a locally installed PostgreSQL database, the process for a remote one is the same.

2017-12-04_21-40-10.png

Identifying the dataset requires the entry of the name and ID.  Then I selected the PostgreSQL dataset type and clicked next.

2017-12-04_21-40-50.png

Next I clicked the KwikSelect icon

2017-12-05_8-41-11.png

Then I picked the appropriate driver.  Note that if you select the ANSI driver you will still be forced to enable unicode characters (you cannot uncheck the option later in the wizard).  Therefore you should pick the unicode driver.

2017-12-05_8-40-44.png

If you don't see any drivers then you need to run the application stack builder and install the appropriate drivers.  As you can see below, I've already installed the drivers I'll need.

2017-12-05_8-42-09.png

The connection string is not much different from SQL Server.  Check with your database administrator to verify that your driver is correct.

2017-12-04_21-46-01.png

Clicking OK will then enter the connection string into the dialog.  You can change the string manually if you need to for some reason.  Though you cannot change the password as it's encrypted here.

Encrypted password

Encrypted password

At the last step in the configuration process I made sure to uncheck the GIS columns option.  I don't currently have PostGIS setup and configured.

2017-12-04_22-15-28.png

The creation of the database finished without error.

2017-12-04_22-17-22.png

Now I can inspect the schema that's been created.  The exact same number of tables exist in PostgreSQL as within SQL.  

2017-12-05_8-36-53.png

From within the client you can see the configuration in the setup information dialog.

2017-12-05_8-49-58.png

The schema manager feature in the Enterprise Studio behaves the same, with all the same options.  To verify that I manually removed some indexes.  Running check should highlight this.

2017-12-05_8-54-56.png

As I hoped the feature works and tells me I'm missing some indexes.

2017-12-05_8-56-44.png

You can also migrate from SQL to PostgreSQL by using the export feature in the Enterprise Studio.

2017-12-05_9-11-27.png

However, take care to plan ahead.  Any dataset created with the GIS options will require the PostGIS be installed locally.  The header of the export will include a message indicating such.

2017-12-05_9-13-18.png