Adding a map to Webdrawer

My out-of-the-box webdrawer interface lacks a map for the results!  Here's what it looks like right now....

2017-09-25_10-20-37.png

Let's fix it!


If I open the results list partial class file in the "/Views/Shared" directory, I can partition the page into two columns.

 
<table id="container" margin="5">
    <thead>
        <tr>
            <td width="50%"><span style="margin-left:10px">Results List</span></td>
            <td width="50%">Results Map</td>
        </tr>
    </thead>
    <tbody>
    <td id="listColumn">
            <!-- Search Results go here -->
    </td>
    <td id="mapColumn"><div id="mapDiv"></div></td>
    </tbody>
</table>

Next we import the google maps API

 
<script type="text/javascript" src="https://maps.googleapis.com/maps/api/js?key=123">
</script>

But I also need to add some code that results in the map being loaded...

 
		<script type="text/javascript">
			var map;
			var markers = [];
			var mapmarkers = [];
			function initialize() {
				var mapOptions = {
					center: new google.maps.LatLng(27.897349,-82.155762),
					zoom: 7,
					disableDefaultUI: true,
					zoomControl: true,
					panControl: true,
					mapTypeControl: true,
					scaleControl: true,
					streetViewControl: true,
					rotateControl: true,
					overviewMapControl: true
				};
 
				map = new google.maps.Map(document.getElementById("mapDiv"), mapOptions);
				addMarkers(map);
			}
            google.maps.event.addDomListener(window, "load", initialize);
		</script>

This gives me my desired user interface!

 
2017-09-25_10-47-07.png

Next I need to have Webdrawer "addMarker" for each record in the results set.  I decided to do this at the very bottom of the results list file, but only if there are records.  And then only for those having a GPS location.

 
if (Model.Results.Count > 0)
{
	<script type="text/javascript">
	@foreach (TrimObject record in Model.Results)
	{
		var gpsloc = record.GetPropertyOrFieldString("RecordGpsLocation");
		if ( !String.IsNullOrWhiteSpace(gpsloc) )
		{
			@Html.Raw("addMarker('" + record.GetPropertyOrFieldString("RecordNumber"+ "','" + gpsloc + "');");
		}
	}
	</script>
}

So now I've got the page calling "addMarker" for each record in the search results.  I need to store each one in memory by pushing it into the array of markers.  I also need to define the addMarkers method called by the initialize function during page load.  In that method I iterate each of the array elements, create a marker on the map, and store that marker reference for later manipulation.

 
<script>
    function addMarker(rnum, ltlg) {
        var marker = { "rnum": rnum, "ltlg": ltlg };
        markers.push(marker);
    }
    function addMarkers(map) {
        for (i = 0; i < markers.length; i++) {
            var marker = markers[i];
 
            if (marker.ltlg.indexOf('POINT('>= 0) {
                var ltlg = marker.ltlg.replace('POINT(''').replace(')''').split(' ');
                var mapmarker = new google.maps.Marker({
                    position: new google.maps.LatLng(ltlg[1], ltlg[0]),
                    map: map,
                    title: marker.rnum
                });
                mapmarkers.push(mapmarker);
            }
        }
    }
</script>

Now if I refresh my results window I can see records plotted on the map.  Success!

 
2017-09-25_11-37-30.png

Whoops.... it's becoming clear that my data import is messed up.  It's including locations beyond my desired regional boundary.  I should only be importing Florida facilities!  That issue will be tabled for now.

Using Xsd to Dynamically change DataPort during install

This post will lead to code which can manipulate the list of available source format in Content Manager's DataPort.  The code is executed as the last action within an installer project for a new data provider.  It loads an Xml document representing the user's list of sources and then either adds to the list or updates existing entries.  During uninstall it will remove only the newly installed source.

What I needed to accomplish this:

  • Microsoft Visual Studio 2017
  • .Net Framework 4.5.2
  • WiX Toolset v3
  • HPE Content Manager 9.1

The user's list of available DataPort sources is located off the roaming user profile.  Within it exists one node typed "ArrayofDataFormatterDefinition".  That, in turn, contains one or more DataFormatterDefinition children.  

2017-09-24_6-30-50.png

The goals include: add, update, or remove items from this configuration file.


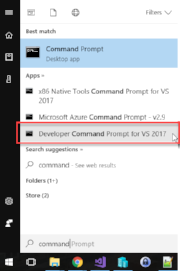
First I launched the Developer Command Prompt for Visual Studio 2017 so that I could mirror someone else's model within my own project.

2017-09-24_4-51-58.png

I navigated into the roaming application data directory for data port preferences.  Executing XSD within that starting directory will make it easier to organize my results.

2017-09-24_4-56-36.png

We can only use XSD on files ending with an ".xml" extension, which the developers have curiously not done.  Since I also don't want to mess up my own copy some how, I might as well go ahead and copy what I've got to a file XSD will accept.  

I did this by executing

copy ImportDataFormatters ImportDataFormatters.xml

Then I execute

xsd ImportDataFormatters.xml

Command Prompt after generating scheme definition

Command Prompt after generating scheme definition

Next I execute

xsd ImportDataFormatters.xsd /c

Command Prompt after generating class definition

Command Prompt after generating class definition

Next I flipped over to Visual Studio and imported the class file.

2017-09-24_5-44-17.png
2017-09-24_6-13-08.png

The file name doesn't match the generated class names.  It doesn't matter either.  What I really want are the properties of the second class defined.  These are the things I want to change for the user. 

2017-09-24_6-15-42.png

In my custom action for this installer I can now serialize and deserialize using the code below.

private static void SaveImportFormattersPreferenceFile(string preferenceFile, XmlSerializer serializer, ArrayOfDataFormatterDefinition importFormatters)
{
    using (TextWriter writer = new StreamWriter(preferenceFile))
    {
        serializer.Serialize(writer, importFormatters);
        writer.Close();
    }
}
 
private static ArrayOfDataFormatterDefinition LoadImportFormattersPreferenceFile(string preferenceFile, XmlSerializer serializer)
{
    ArrayOfDataFormatterDefinition importFormatters;
    using (StreamReader reader = new StreamReader(preferenceFile))
    {
        importFormatters = (ArrayOfDataFormatterDefinition)serializer.Deserialize(reader);
        reader.Close();
    }
 
    return importFormatters;
}

Next I need the logic to find entries in the list or to create a new one.

XmlSerializer serializer = new XmlSerializer(typeof(ArrayOfDataFormatterDefinition));
ArrayOfDataFormatterDefinition importFormatters = LoadImportFormattersPreferenceFile(preferenceFile, serializer);
List<ArrayOfDataFormatterDefinitionDataFormatterDefinition> items = importFormatters.Items.ToList();
var item = importFormatters.Items.FirstOrDefault(x => x.ClassName.Equals("CMRamble.DataPort.Acme"));
if (item == null)
{
    item = new ArrayOfDataFormatterDefinitionDataFormatterDefinition();
    items.Add(item);
}

After I'm done manipulating the item I have in memory, I need to save the changes to disk.

importFormatters.Items = items.ToArray();
SaveImportFormattersPreferenceFile(preferenceFile, serializer, importFormatters);

During my uninstall action I need to basically repeat the process, but this time just remove anything matching my class name.

XmlSerializer serializer = new XmlSerializer(typeof(ArrayOfDataFormatterDefinition));
ArrayOfDataFormatterDefinition importFormatters = LoadImportFormattersPreferenceFile(preferenceFile, serializer);
List<ArrayOfDataFormatterDefinitionDataFormatterDefinition> items = importFormatters.Items.ToList();
importFormatters.Items = items.Where(x => !x.ClassName.Equals("CMRamble.DataPort.Acme")).ToArray();
SaveImportFormattersPreferenceFile(preferenceFile, serializer, importFormatters);

And that's it!  The above code can be attached to any WiX installer action.  

Removing Record Contact Relationships

Background

Whilst helping a customer upgrade to the latest version of Content Manager, I saw something that I've been seeing more often.  They had numerous unknown locations associated as contacts to their email records.  That is common enough, but these were improperly parsed SMTP addresses.  

The administrator of that dataset was manually removing these locations from the dataset as they have no value.  However, Content Manager does not allow you to remove a location if there are contact relationships in existence.  The screen-shot below demonstrates the error message you'd receive if you tried to manually remove the location.

Error Message

Error Message

To work around this the administrator was selecting a location to use as a replacement.  The end result is a location in Content Manager which is a contact on thousands upon thousands of records.  It doesn't make much sense to me.

Solution

One possible solution is to create a new add-in which would allow the administrator to remove the contact relationships before deleting the location.  Other possible solutions include: location add-in to automatically removing all contact relationships pre-delete, record add-in to automatically remove all contact relationships post-save, event processor add-in to automatically remove the contact relationships post record registration, and a stand-alone console app to show/correct all locations with this issue.  To me it makes the most sense to create a location add-in which allows the administrator to manually remove these contact relationships.  If the solution works well, then crafting something to do it in an automated fashion would make sense as the next step. 

You can download the add-in here.

Solution in Action

When the administrator right-clicks on a location they'll see this:

When the administrator clicks the "Remove Contact Relationships" they'll either be prompted to confirm the removal of the record contact relationships, like so:

Confirm Removal

Confirm Removal

Or the administrator will be told there are no relationships to remove:

No contact relationships Dialog

No contact relationships Dialog

After the removal has completed the results are shown to the administrator:

Removal Results Dialog

Removal Results Dialog

The add-in also works if you tag multiple locations and then invoke the add-in:

Multiple locations tagged

Multiple locations tagged

The behavior is slightly different when working with tagged locations.  You won't be prompted to confirm the removal.  The record contact relationships will be removed and then a results dialog will indicate the total number removed, as shown below.

Results when removing from tagged locations

Results when removing from tagged locations

Installing the Add-in

Launch the installer and then click next on the welcome dialog:

Welcome dialog

Welcome dialog

Alternate the installation path, if necessary, to reflect the actual folder of your HPE Content Manager x64 installation.  The installer does not intelligently detect the actual install folder.  Click Next after confirming installation path.

Installation Path

Installation Path

Click Install when presented with the confirmation dialog:

Confirmation Dialog

Confirmation Dialog

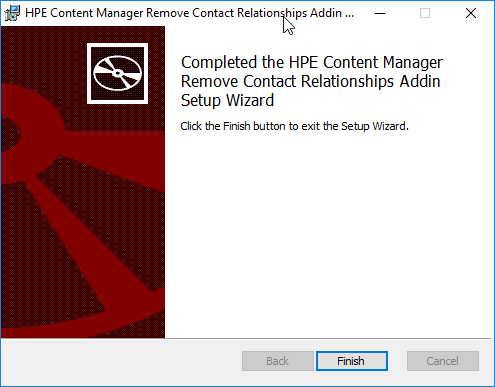
Depending on your workstation configuration, you may be prompted by Windows to authorize the installation.  Click yes if prompted.  Once the installation is completed you'll be shown the completion dialog.  Click Finish on that to close the installer. 

Completion Dialog

Completion Dialog

If you open windows Explorer you should see one new file in the installation folder:

Windows Explorer View

Windows Explorer View

Configuring the add-in

Open HPE Content Manager and then click External Links from the Administration ribbon:

HPE Content Manager Administration Ribbon

HPE Content Manager Administration Ribbon

Click New Generic Add-in (.Net):

External Link Dialog

External Link Dialog

Update the new generic add-in dialog as shown in the image below and then click Ok

Add-in Properties

Add-in Properties

If the Add-in is installed correctly then the dialog will close and you'll see the add-in listed in the listbox on the external links dialog, as shown below.

Click Properties and then click the Used By tab:

Check both the unknown and person location types and then click Ok.

Used By tab of the external link

Used By tab of the external link